


Painting Farmyard Hens
Watercolour chickens for beginners
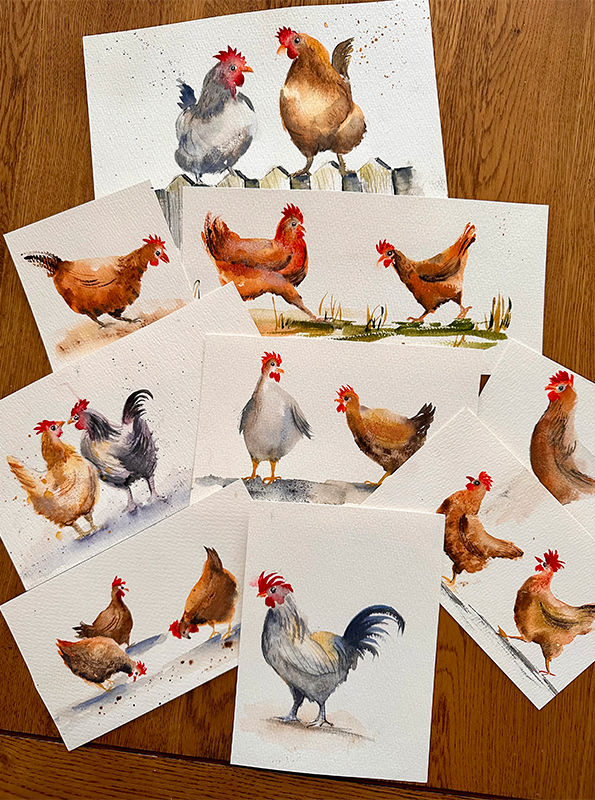
Hens are wonderful subjects for watercolour. They have quirky personalities, lovely shapes, and soft feather textures that suit a loose style perfectly. They are also ideal for practising simple drawing, wet-into-wet colour blending, expressive brushwork and letting go of perfection.
Beginner Tips for Success
-
Keep It Loose - hens are fluffy, uneven creatures. Perfect lines are not needed
-
Use Plenty of Water
-
Soft blends create feathery effects beautifully - don’t chase every feather
-
Paint several quickly - the second or third hen is usually better than the first
-
Materials
-
Some reference photos of hens
-
Watercolour paper (cold-pressed)
-
2 Round brushes (size 6–or size 2)
-
Pencil & eraser
-
Water jar & kitchen roll
-
Cocktail stick
-
Fineliner (optional)
Colours (suggested)
-
Brown hen: Yellow Ochre | Burnt Sienna | Burnt Umber
-
White or grey hen: Burnt Sienna & Ultra Marine Blue
-
Comb & Wattle: Cadmium red or vermillion
-
Beak: orange
-
Ground: Mix of browns, or Sap Green (mixed with a bit of red to tone it down)

Step 1: Sketch your hen or not?
Hens are easier to draw than they look because they are built from simple shapes.
Rule of Thumb Proportions
-
Body = roughly half the total height
-
Head and neck = quarter
-
Legs = quarter
-
The head is quite small
-
Top of legs are hidden by feathers
Shape Idea
Think of the body as:
-
A rounded letter D
or -
A soft oval / circle
or -
A triangle
Then add:
-
Curved neck
-
Tiny head
-
Tail flicking upwards
-
Two thin legs
If you can, try and paint the hens without a sketch - it will keep them lively. If you do sketch, keep your pencil lines light and simple and do not overdraw details.
Tip: Personality comes from the pose more than perfect drawing

Step 2 – Wet the Body
Using a watery, feint, yellow ochre , lightly dampen the paper. You're just tentatively mapping out the shape of the hen
Avoid soaking the paper. You want a soft sheen, the water should not be rolling around on the paper.
Leave the head mostly clear of paint for now
While still slightly damp, drop in stronger pigment:
-
some burnt sienna, starting a 1/3 way down the body
-
now drop in some burnt umber around the bottom of the belly and let it spread up
-
notice that the neck is often a darker colour than the body, drop some darker colour in here too
This creates instant form.
Let edges blur softly and mingle naturally on the paper. Do not scrub or overwork
While still wet, use a cocktail still to add some wing markings and some feather suggestions on the neck.
You can also try adding in salt to the body to create abstract feathers and interest
Finally add a few flicks for the tail
Step 3 – Paint the Comb and Beak
When the body is dry:
Comb & Wattle
Use cadmium red or vermillion. You can really add character and personality here
A few quick confident strokes are better than fiddling
Beak
Yellow ochre + tiny touch of cadmium red or orange. Look at your reference photos. The beak has a downward curve

Step 4 – Legs and Feet
Use a fine brush or alternatively add these with a black fineliner
Mix:
-
Raw umber + Payne’s grey
or -
Yellow ochre + grey
Paint simple thin legs
Remember the top of the legs disappear into feathers
Keep feet minimal — just enough marks to suggest claws
Step 5 – Ground Shadow
A hen floating in space looks odd
Add a loose shadow beneath feet using diluted grey or brown
Drag horizontally with a dry brush
This anchors the bird
You can throw in a few paint splatter bread crumbs, it might be hungry
Step 6 – Final Character Touches
Now step back.
Ask:
-
Does it need a darker eye dot?
-
Stronger comb?
-
Tail accent?
-
Belly shadow?
One or two finishing marks are often enough
Then stop
Freshness is the magic of watercolour


Book Your Spot

Ended
From 20 British pounds
Started Sep 21
125 British poundsLoading availability...
Loading availability...

Started Sep 15
125 British poundsLoading availability...
Loading availability...

Started Sep 16
125 British poundsLoading availability...
Loading availability...

Started Sep 19
From 115 British poundsLoading availability...
Loading availability...

Ended
105 British pounds